Download PDF
The actions in this Guide can only be performed by the following roles:
Instructions
Geographical Areas define the locations for which a person can invite and accept new users, create Facilities, and allocate Items within STOCKHOLM.
Each Administrator of a Geographical Area (Admin GA) can see and take actions below the level of their assigned GA. For example, a Global Administrator (Admin GA: World) can manage sub-regional, regional, country and provincial levels (see the Roles User Guide).
A user’s Geographical Area is reflected in their Personal Dashboard.
STOCKHOLM uses a system of “parent” and “child” Geographical Areas. A larger parent Geographical Area must always be selected before creating a smaller child Area. For example, when creating a Geographical Area for Africa, the parent Area will be “World”. Likewise, when creating “Mozambique”, the parent Area will be “World-Africa”.
How to create a Geographical Area
- Open the Manage Data section.
2. Select Geographical Areas.

3. Select the type of map you prefer:
a) Open Street Map (as used in this guide), or
b) ARCGIS imagery.

4. Select create Area.

5. When the Create geographical area box opens, select the parent geo area from the drop-down list. You can also type in the box to look for a Geographical Area. This field is mandatory.
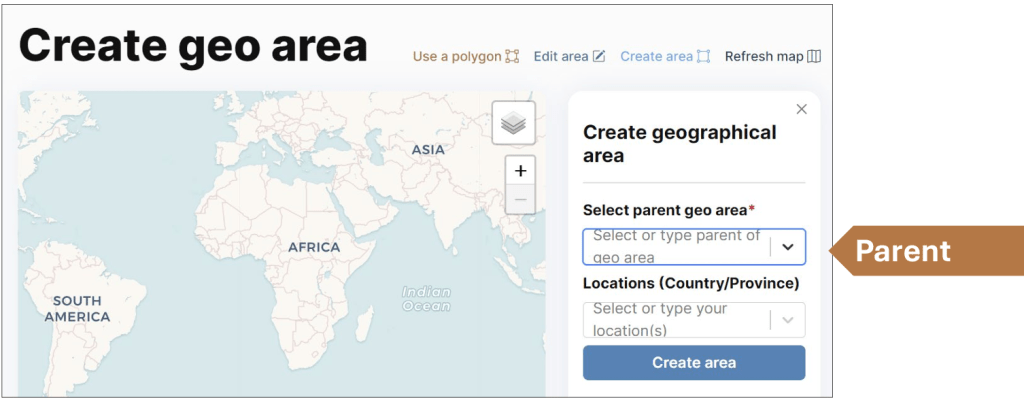
The highest parent geographical area you can select is the one you are assigned to. You cannot select a geographical area above that.
6. Select the Locations (Country/Province) of the Geographical Area you wish to create. You can select as many as required. Each area that you select will become red on the map.
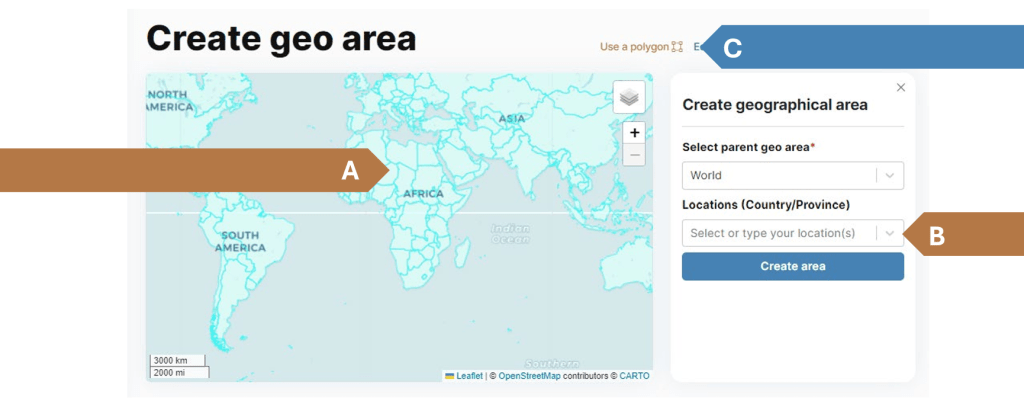
There are three ways to do this:
A. Click on any country highlighted in blue on the map.
B. Select from the drop-down list, or type in the search box.
C. Select the Use a polygon button, and click on points on the map. With every click a small square will appear, drawing a side of your polygon that defines the Geographical Area. Close the shape by clicking again on the starting point/first blue square (other squares are coloured white).

7. To remove a country, either click it on the map or click on the “x” next to the country’s name. The country is removed when the highlight colour turns blue again.
8. Select create area.
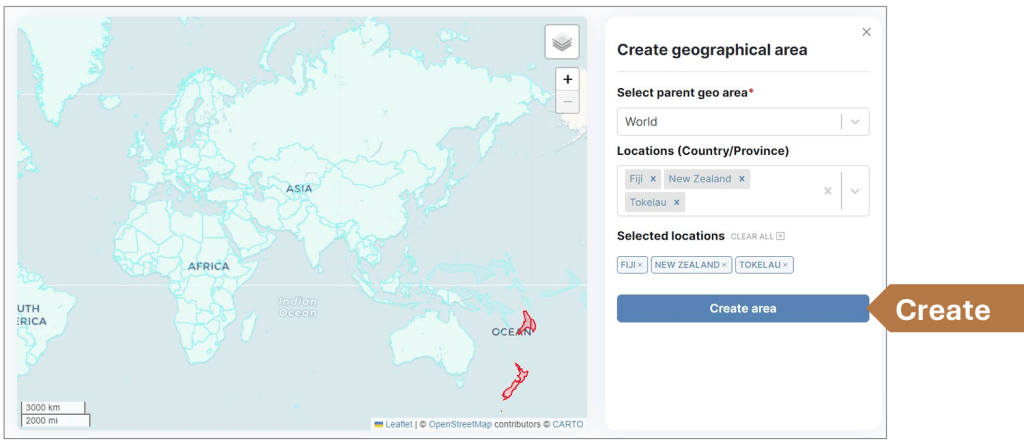
9. When the pop-up box opens, choose a name for your Geographical Area.

10. Select Create. A pop-up notification will confirm your Geographical Area has been created.
You are now ready to create additional “child” Geographical Areas, such as countries within a region or provinces within a country.
Follow the steps described above to complete this process, selecting the highest desired GA available to your role.