Download PDF
The actions described in the first section of this Guide can only be performed by the following roles:
Instructions
An Administrator of a Geographical Area (Admin GA) can create a Facility anywhere in the Area they have been assigned to.
A Facility created outside a user’s Area will generate an error message within the platform. A Facility can only be assigned to a Geographical Area that has already been created (see the Geographical Areas User Guide).
How to create a new facility
1 . Open the Manage Data menu.
2. Select Facilities

The Manage facilities page will open. If you organization has previously added Facilities, they will be displayed here.
3. Click the Add new facility button.

A blank form will open, where you can enter the details of the Facility that you wish to add.

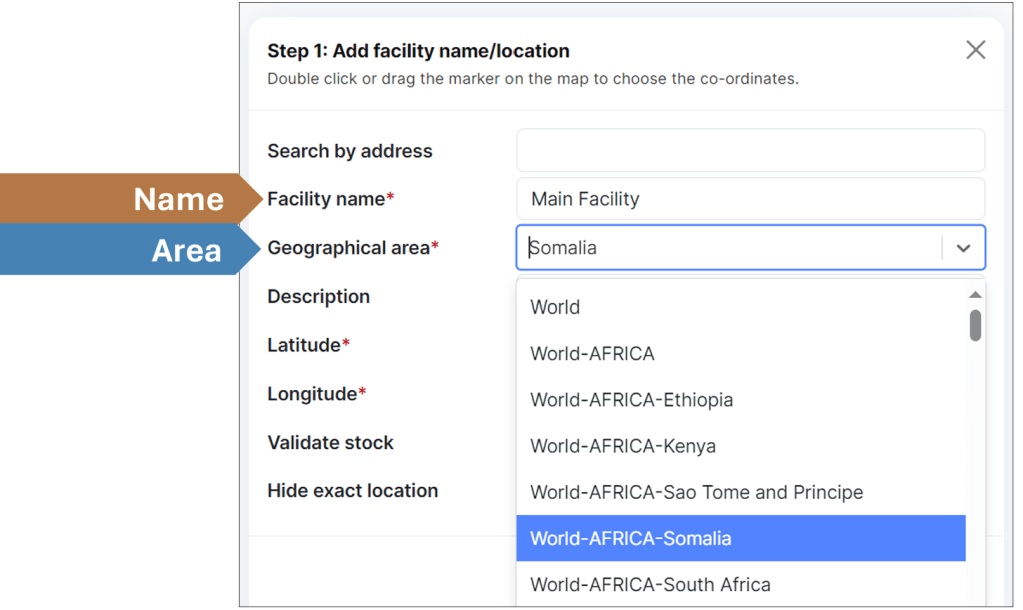
4. Start by giving a name to the Facility you are creating. This can be a name of your choice or follow any conventions adopted by your agency.
5. Type the name of the Geographical Area where the Facility is located, or select the arrow to see the drop-down list. Available Geographical Areas will appear in geographical and alphabetical order.
In the example below, we have given the name ‘Main Facility’ and chosen the Geographical Area ‘World-Africa-Somalia’.
6. Add an optional Description of your facility. This can help to identify and distinguish facilities at a later stage (for example, in cases where you have many facilities in the same Geographical Area).
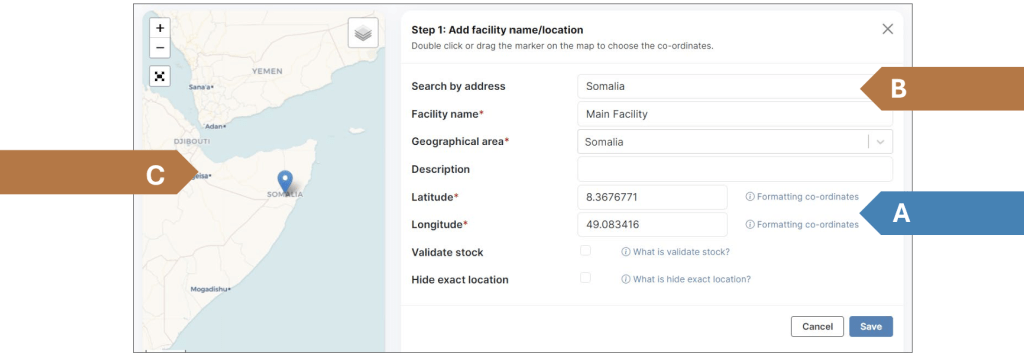
7. Enter the Latitude and Longitude coordinates of the Facility. There are three ways to do this:
A. Type directly into the Latitude and Longitude boxes if you already have the GPS coordinates available.
B. Search by Street address using the search box at the top. Choose from the options that appear below the search box.
C. Use the map can help you find coordinates for a Facility. Drag the marker to the location of the Facility, or double-click the map to set the blue marker in place. Use the controls on the left side to zoom and enlarge the map. The coordinates will then be filled in automatically in the form.
8. Validate stock: when your Facility Manager adds or updates stock information, you can decide if you want to check this information before it is published in STOCKHOLM.
Tick the box if you prefer to validate entries before they go live.
9. Hide exact location: you can choose to hide the exact location of your facility on the stock mapping (for example, for security reasons).
Tick the box if you prefer to determine which Geographical Area the Facility will be displayed in. Then Select from the drop-down list that appears underneath.

10. Select Save. A pop-up notification will confirm you have successfully created the Facility.
Once you have created a Facility, you will be given the option to allocate Items to that Facility. See the Creating Items User Guide.
How to view and edit facilities
1 . On the Manage facilities page, you can choose to display your existing facilities either as Cards or in a Table. In both cases, facilities can be sorted by name (alphabetical order or reverse).
You can also use the search bar on top to look for Facilities.

2. Click the blue pencil icon to open and edit a Facility.
3. Click the red trash can icon to delete a Facility.
