Download PDF
The actions described in this Guide can only be performed if you have already created an Item and have created the Facility to which the Item needs to be allocated.
Instructions
Every Item needs to be allocated to a Facility in STOCKHOLM. There are two ways to allocate an Item, through either the
- Manage item list section, as explained in this Guide, or
- Manage facility section.
How to allocate items to a facility
Through the manage item list page
1 . Select the Manage Data menu.
2. Select Item list.

The Manage item list page will open, displaying all Items that your organisation has already added on STOCKHOLM.
3. Locate the Item that you want to allocate. You can also type into the search bar to look for the Item.
In the example below, we search for ‘Blanket’.

4. Click the blue pencil icon to open the Item.

5. Click the Allocate to a new facility button.
A blank form will open, where you can enter the details of the Item that you wish to allocate.
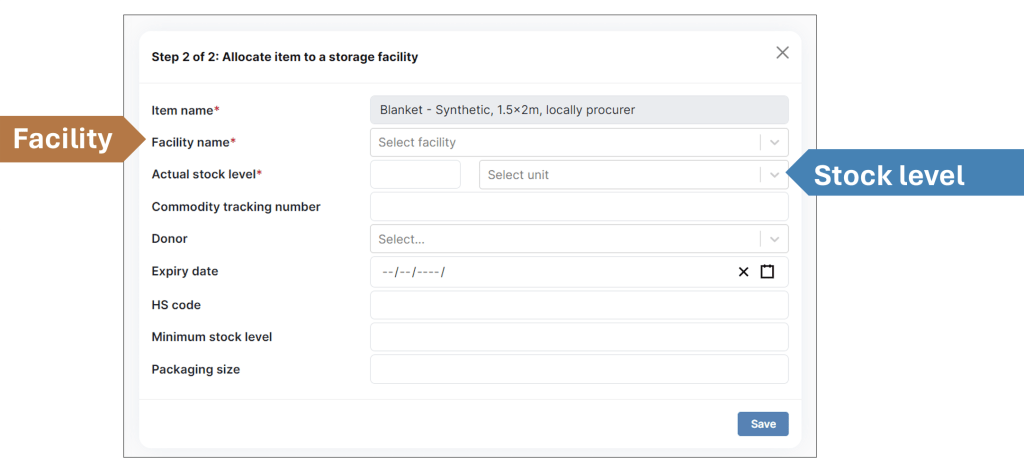
6. Select the name of the Facility where you wish to allocate the Item.
7. In the Actual stock level field, type the quantity of items currently in stock and specify the Unit of measure.
8. Complete other relevant fields. Any mandatory attributes will be indicated by a red asterisk (*).
9. Select Save. You will receive a pop-up notification to confirm your Item was successfully updated.
Follow the same steps described above to assign the Item to another Facility. You can add an item to as many facilities as you need.
ALTERNATIVE WAY TO ALLOCATE ITEMS TO A FACILITY
It is also possible to allocate Items using the Manage facility section.
See pages 1 and 2 of the Updating Item Quantities User Guide for help to access the Facility menu.